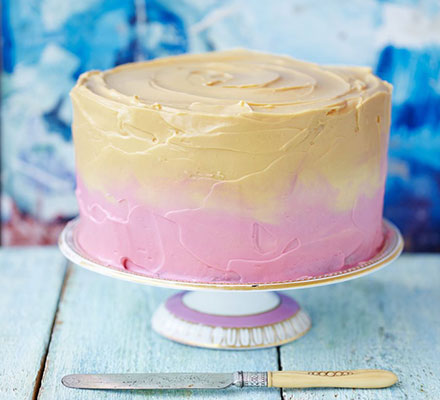

Raspberry caramel ombre cake
By Cassie Best
This stunning layer cake with coloured cream cheese frosting is perfect for a birthday, wedding or other special occasion
-
Prep:1 hrs 10 mins
Cook:1 hrs
plus chilling - More effort
Nutrition per serving
-
kcal 730
-
fat 43g
-
saturates 26g
-
carbs 81g
-
sugars 62g
-
fibre 2g
-
protein 7g
-
salt 1.1g
Ingredients
- 400g butter, softened, plus a little extra for greasing
- 400g soft light brown sugar
- 5 large eggs
- 400g self-raising flour
- 2 tsp vanilla extract
- 2 tbsp milk
- 200g raspberries
- 397g can caramel (we used Carnation)
- 300g tub full-fat cream cheese
- 140g butter, softened
- 300g golden icing sugar
- 100g raspberries
- pink and caramel food colouring pastes
Method
Heat oven to 160C/140C fan/gas 3. Grease and line the base and sides of 2 x deep 20cm cake tins with baking parchment. In a large bowl, beat the butter, sugar and 1?4 tsp salt with an electric hand whisk until light and fluffy. Add the eggs, one at a time, beating well after you add each one. If it looks like it might split, add spoonfuls of the flour. Add the remaining flour, then stir in the vanilla and milk and gently fold through the raspberries, trying not to break them up too much. Divide the mixture between the tins and bake for 50-55 mins, or until a skewer inserted into the centre of the cakes comes out clean. Cool in their tins for 20 mins before flipping onto wire racks, so the base now becomes the top, to cool completely.
To make the icing, put 1 tbsp of the caramel, the cream cheese, butter and icing sugar in a large bowl and beat with an electric hand whisk until smooth – try not to overbeat or the icing may become runny. Split the cakes through the centre using a large serrated knife. use a little of the cream cheese icing to stick one cake layer to a board or cake stand. layer the remaining cake layers on top, filling with the caramel and some raspberries between each layer, finishing with a flat top of caramel.
Using roughly a third of the icing, cover the cake with a thin layer using a palette knife – don’t worry too much about getting it smooth at this stage, this first coat is to fill any gaps between the sponges and catch any crumbs. Once covered, chill for 30 mins.
Split the remaining icing between two bowls, with roughly two-thirds in one bowl and the remaining third in the other. use a little food colouring to dye the smaller batch pink, and the other a biscuity-caramel colour. Remove the cake from the fridge. Dollop the caramel coloured icing on top of the cake and, using your palette knife, spread the icing over the top, then tease it down the sides, stopping roughly halfway down. use the pink icing to cover the bottom half of the cake.
You should now have a stripe of pink at the bottom and caramel icing on the top half of the cake. Clean your palette knife and gently swipe the icing upwards, through the pink into the caramel, blending the colours together. Continue to do this around the cake, wiping your palette knife between each swipe. Once you’ve gone all the way around, run your palette knife all the way around the edges to smooth the surface, or leave it more rustic if you prefer. Best eaten within 1 day of making, will keep in the fridge for up to 3 days, just bring to room temperature before eating.